In the automation section you can take your devices, and run jobs on them. These jobs are written in python code and will allow you to execute cli commands on your device. You can configure your devices, and run show commands and parse the results the way you’d like.
The automation section contains two tabs:
- Jobs allows you to create, edit and run jobs
- Logs allows you to view the results and logs of these jobs
Jobs

In this section you can run your jobs. You can either run a job that you have predefined, or you can quickly create an ad hoc one. Clicking on one of the jobs allows you to edit, debug and run it. Create job allows you to create a new job. Refresh refreshes the list, and Clone allows you to git clone the list of jobs, so that you can edit and manage them in your favourite editor.
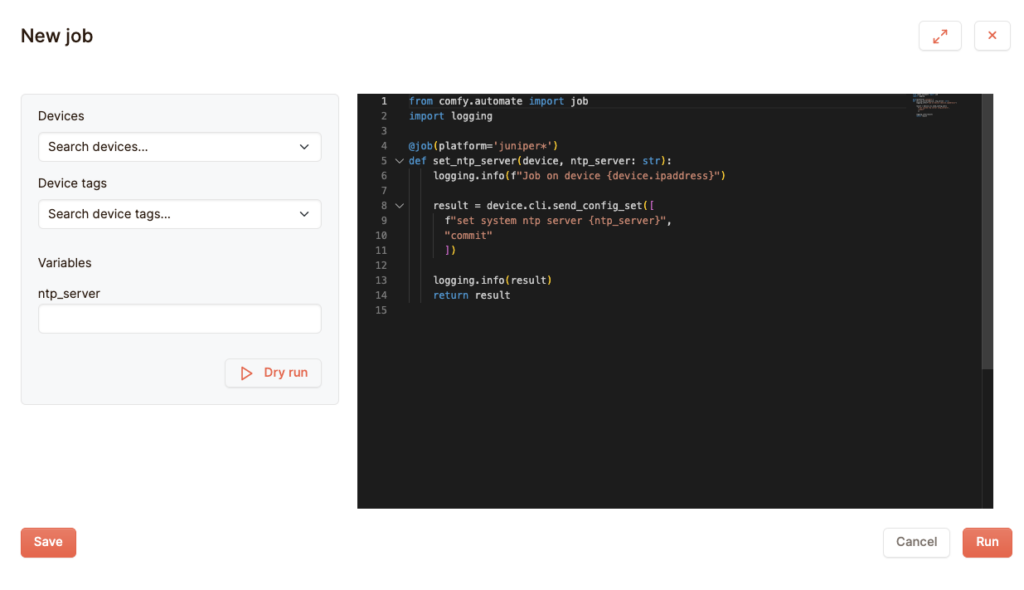
Clicking on Create job opens the job editor:

You’ll see a number of fields here. The right column shows the python editor: here you can edit the code to be executed on your job. The python code works like this:
- It needs to be valid python code. Properly indented and without syntax errors.
- Your python code needs to contain a function. Without it, the job won’t work.
- You can add decorators to your function. If you look at the default code, you’ll see that the @job decorator has the argument ‘platform‘. This only executes this function on devices with that platform. * is a wildcard.
- If you use the device parameter, you can access the device. You can view its attributes and send commands.
- You can also send along other variables. They will appear in the left column, and you can enter their values in the job editor and these values will be available once the job is run.
- Logging can be done using the logging library. This needs to be imported to use.
The left column contains a number of fields for running the job. You can select the devices to run the job on, either per device or per tag. Below are fields for the variables in your job.
The Dry run button will allow you to test your job. It will show you the commands that will be executed on your device, without executing them on your device. This is a good function for when you’re developing your more complex jobs. Note that unlike when running the job, you can only dry run your job on a single device.
When you click on Run, the job is run. At the moment the job is run immediately. A future feature will be for you to schedule running your job on a time you desire.
When you click on Save, the job is saved, so that you can access and run it again in the future. These jobs are saved on disk, in a git environment, allowing you to also keep track of your changes.
Note: when you want to execute a show command, you can use device.cli(‘command’). When you want to execute a config command, you can use device.cli.send_config_set(‘command’). Arguments are either strings, or lists of strings.

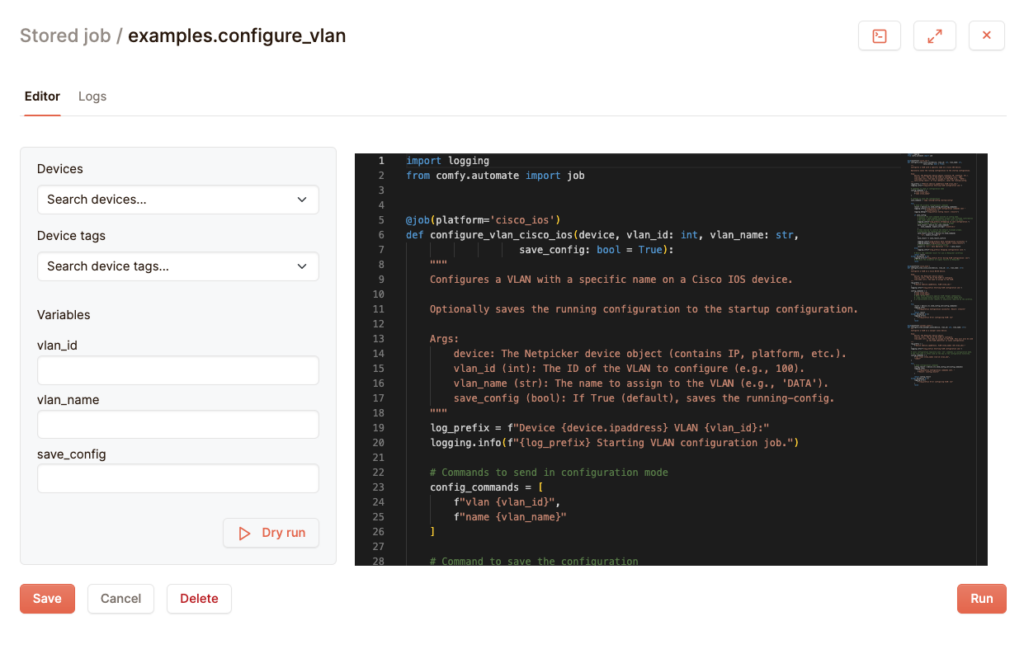
Clicking on an existing jobs will allow you to edit it. The same applies as with the create form.
Logs

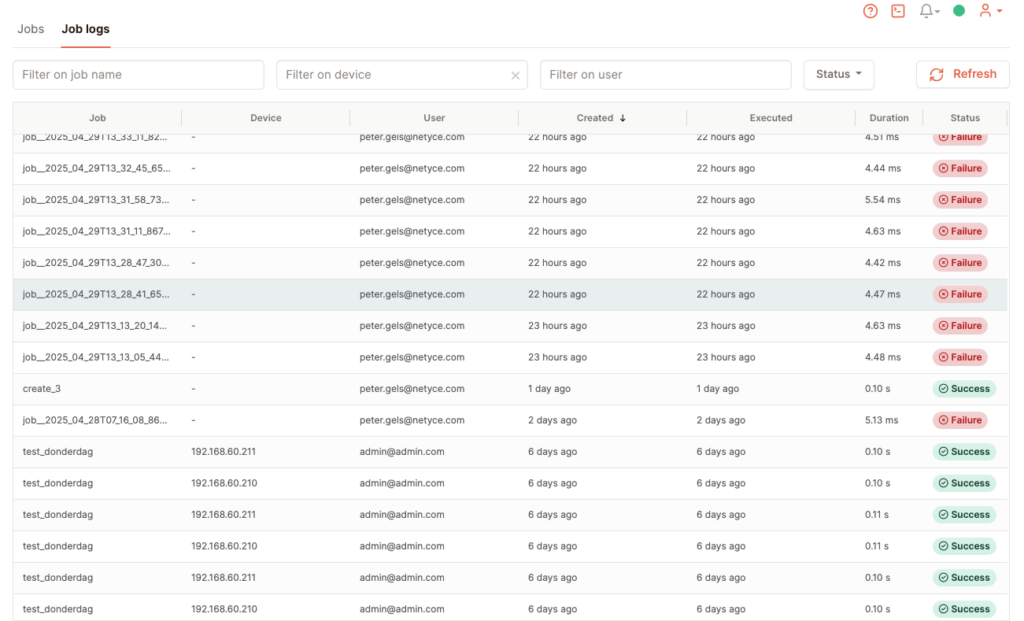
In the logs section you can view the outcomes of the jobs you have scheduled. You can filter, and clicking on one the record will show its details.
